The short answer: Organize for visibility and safe containment without blocking vents. Keep the refrigerator at 40°F or below and verify with an appliance thermometer rather than relying only on a dial number.
Before you start
Check the situation in front of you
Useful home guidance begins with the exact space, model, label, and routine you have. Make these checks before turning a general idea into a household habit.
- Read the refrigerator manual for vent and compartment locations.
- Discard food according to current food-safety guidance, not appearance alone.
- Clean spills using the surface and food-safety instructions that apply.
Try this at home
A practical route, one step at a time
Move through the sequence in order. Keep notes on what you observe, and change only one variable at a time when you want to understand the result.
- 1
Map the fixed features
Identify vents, temperature sensors, drawers, and adjustable shelves. Leave the clearances described by the manufacturer so containers do not interrupt designed airflow.
- 2
Create visible zones
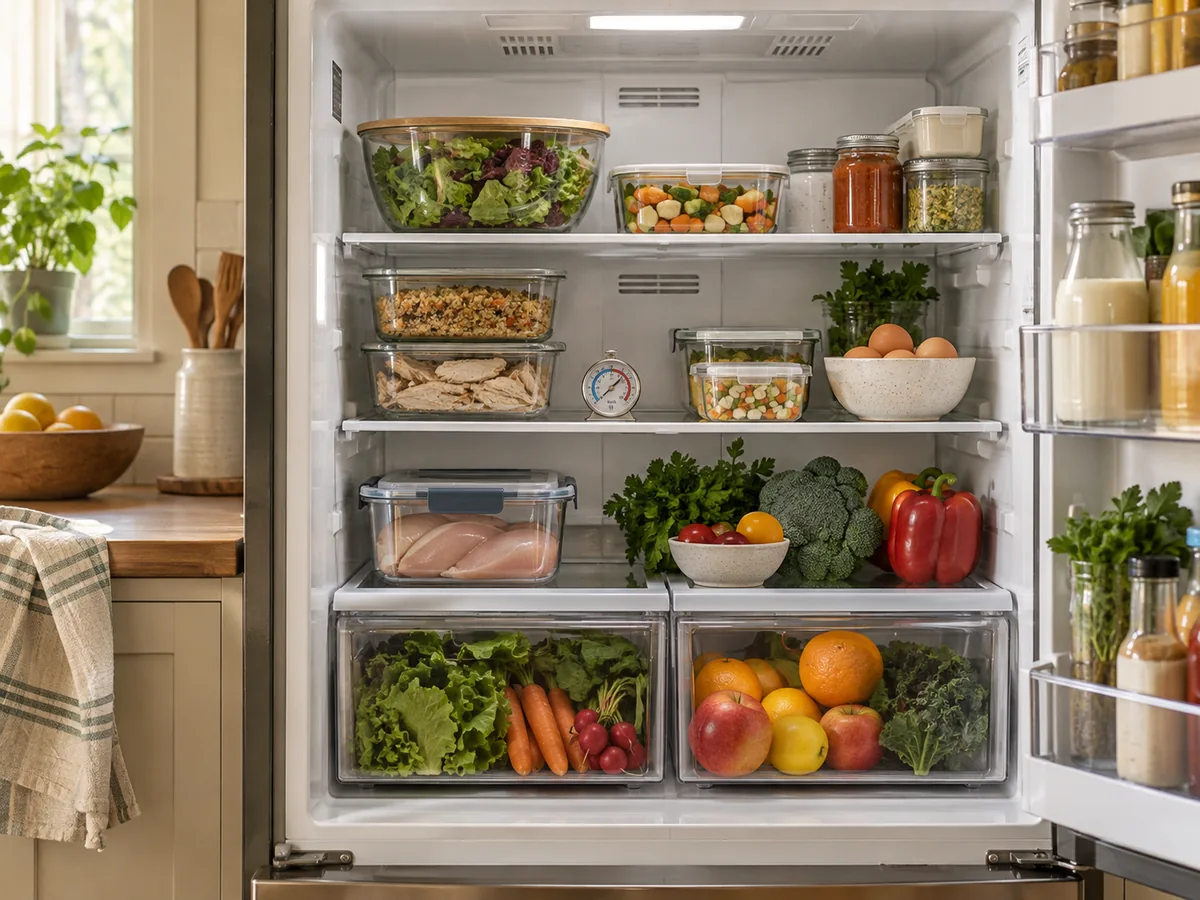
Group ready-to-eat foods, ingredients, leftovers, drinks, and produce in shallow zones. Clear containers can help, but labels and dates matter more than matching bins.
- 3
Contain raw foods
Keep raw meat, poultry, and seafood securely wrapped or in a sealed container so juices cannot reach other food. Choose a stable lower location that does not block a vent.
- 4
Verify the temperature
Place an appliance thermometer where the manufacturer or USDA guidance makes sense and allow it time to stabilize. Adjust controls gradually and recheck rather than chasing a momentary reading.
- 5
Build a use-first view
Reserve one front section for food that should be eaten soon. Review it before shopping so the organizing system changes decisions instead of merely rearranging packages.
Make the result repeatable
Use what you noticed, not a perfect-looking setup
Begin with map the fixed features, because that establishes the condition you are actually working with. Then move through create visible zones, contain raw foods, verify the temperature. Those middle checks turn “make food visible, protect airflow, separate raw items, and verify temperature with an appliance thermometer.” from a general idea into a sequence you can evaluate in your own home.
Give the change enough time to reveal a pattern, but do not keep adjusting several things at once. Write down the date, the room or device, the exact setting or arrangement, and what happened next. For equipment questions, add the model number and manual page. For room questions, add weather, time of day, and who was using the space. A small record is more dependable than memory after the next bill, load, or season arrives.
Finish with build a use-first view. If the result is useful, keep the smallest version that solves the problem and add it to the household notes. If it is inconvenient, inconclusive, or conflicts with an instruction, restore the starting condition. A reversible trial is still useful when it tells you which explanation or purchase does not fit. Keep the record with the matching bill, manual, room note, or shopping question so the next comparison begins with context instead of a fresh guess.
Good to know
Conditions, limits, and the point to stop
Food safety depends on time, temperature, condition, and the food involved. During an outage or suspected temperature problem, follow current USDA guidance rather than tasting food to decide.
Takeaway
Keep these four points
- Vents and sensors located
- Raw foods contained
- Temperature at 40°F or below verified
- Use-first area established
Sources and review
Where the factual guidance comes from
- USDA Food Safety and Inspection Service — Refrigeration & Food SafetyChecked October 14, 2026
Read our Editorial Standards or report a correction.